Introduction

Groovy provides a very easy way to interact with the user via run time prompts, or RTPs.  These can be linked to dimensions, members, and input.  One of the huge benefits of getting RTPs in Groovy is that the result can be validated, and the calculation can be cancelled if they don’t validate (we will touch on this in a future post).

The Solution

This is one of the easier things to do with a Groovy calculation.  There are two things required.  First, the Groovy calculation must prompt the user to select a value.  This is done by doing the following.

/*RTPS: {RTP_Consolidate_Data}*/

At any point in the script after the above, the value can be used.  If it is going to be used multiple times, it might be easier to set a variable.  Regardless of the approach, the value can be referenced using the rtps object as follows.

 String sRTP
 sRTP = rtps.RTP_Consolidate_Data.toString()

That is all that is required!

Conclusion

Beyond the obvious uses of an RTP, I have started using these for a number of other reasons.

  • On global forms where multiple values may be changed throughout a short period of time and execute long running calculations, like allocations, I have seen benefits of prompting a user with a yes/no smartlist RTP.  If the user has more changes, they may not need to execute the calculation after every save.  This gives them the option.
  • If there is a requirement where some prompts are dependent on other prompts, using RTPs in Groovy gives you the flexibility to validate the combination.  For example, if an employee is set to hourly with a VP title, the prompts can be validated and returned to the user as invalid combinations before the prompts are removed from user view.
 

Introduction

With the introduction of Groovy Calculations this summer, one of the things I use most, especially for applications with data forms that include a large sparse dimension in the rows with suppression on, is the option to loop through cells and identify only the POV on the cells that have changed.  Read more


Reports out of Hyperion Planning are typically identified in 2 categories.

  • Standard “canned” reports – These reports are used generically in a global aspect to report data in common formats and standardized views. These are often generated in volume and printed for presentations and executive review.
  • Ad hoc reports – These reports are more flexible, often adjusted to explain current variances and market conditions. These reports are most likely generated by analysts and managers producing unique views to explain variances that exist at a point in time.  The need to alter, change, and customize these reports are essential to identify and explaining current business conditions.

Read more


Introduction

We all know the Data Form validation rules are serviceable, but they are not robust.  When Smart View advanced and forms were opened in Excel, the validation logic developers had in JavaScript became useless.  Since then, we have really missed the ability to communicate with the user interactively with visual cues and validation rules that halted the saving of data.  Well, Groovy calculations to the rescue! Read more


What Is Groovy

Recently, Groovy scripting was added to ePBCS business rules as an option instead of the GUI, or the go-to scripting for you old-timers who still refuse to change.  These are defined in the Business Rule editor as Groovy calculations.  So, what is Groovy? Read more


If you are a fan of the HSGetValue and HSSetValue, you probably are using a private connection. As you know, anybody that uses the template has to either change the connection string to their own predefined private connection, or set up a private connection with the same name. When dealing with inexperience users, both methods can be problematic.

You may be surprised to know that the Get and Set Value functions can use a shared connection. Read more


Problem

I am currently working with a client that is updating a planning application and one of the changes is to remove a dimension.  After the new application was setup and the hierarchies were modified to meet the objectives, migrating artifacts was the next step.  As many of you know, if you try to migrate web forms and composite forms, they will error during the migration due to the additional dimension in the LCM file.  It wouldn’t be a huge deal to edit a few XML files, but when there are hundreds of them, it is extremely time consuming (and boring, which is what drove me to create this solution).

Assumptions

To fully understand this article, a basic understanding of XML is recommended.  The example below assumes an LCM extract was run on a Planning application and it will be used to migrate the forms to the same application without a CustomerSegment dimension.  It is also assumed that the LCM extract has been downloaded and decompressed.

Solution

I have been learning and implementing PowerShell scripts for the last 6 months and am overwhelmed by how easy it is to complete complex tasks.  So, PowerShell was my choice to modify these XML files in bulk.

It would be great to write some long article on how smart this solution is and overwhelm you with my whit, but there is not much too it.  A few lines of PowerShell will loop through all the files and remove the XML tags related to a predefined dimension.  So, let’s get to it.

Step 1 – Understand The XML

There are two folders of files we will look to.  Forms are under the plan type and the composite forms are under the global artifacts.  Both of these are located inside the resource folder.  If there are composite forms that hold the dimension in question as a shared dimension, both will need to be impacted.  Scripts will be included to update both of these areas.

Inside each of the web form files will be a tag for each dimension, and it will vary in location based on whether the dimension is in the POV, page, column, or row.  In this particular example, the CustomerSegment dimension is in the POV section.  What we want to accomplish is removing the <dimension/> tag where the name attribute is equal to CustomerSegment.

For the composite forms, the XML tag is slightly different, although the concept is the same.  The tag in composite form XML files is <sharedDimension/> and the attribute is dimension, rather than name.

Step 2 – Breaking Down the PowerShell

The first piece of the script is just setting some environment variables so the script can be changed quickly so that it can be used wherever and whenever it is needed.  The first variable is the path of the Data Forms folder to be executed on.  The second is the dimension to be removed.

# Identify the source of the Data Forms folder and the dimension to be removed
# List all files, recursively, that exist in the path above
$files = Get-ChildItem $lcmSourceDir -Recurse | 
where {$_.Attributes -notmatch 'Directory'} |

The next piece of the script is recursing through the folder and storing the files in an array.  There is a where statement to exclude directories so the code only executes on files.

# List all files, recursively, that exist in the path above
$files = Get-ChildItem $lcmSourceDir -Recurse | 
where {$_.Attributes -notmatch 'Directory'} |
Step 3 – Removing The Unwanted Dimension

The last section of the script does most of the work.  This will loop through each file in the $files array and

  1. Opens the file
  2. Loops through all tags and deletes any <dimension/> tag with a name attribute with a value equal to the $dimName variable
  3. Saves the file
# Loop through the files and find an XML tag equal to the dimension to be removed
Foreach-Object {

$xml = Get-Content $_.FullName
$node = $xml.SelectNodes(“//dimension”) |
Where-Object {$_.name -eq $dimName} | ForEach-Object {
# Remove each node from its parent
[void][/void]$_.ParentNode.RemoveChild($_)
}
$xml.save($_.FullName)
Write-Host “($_.FullName) updated.”
}

Executing The Logic On Composite Forms

The above concepts are exactly the same to apply the same logic on composite forms files in the LCM.  If this is compared to the script applied to the web forms files, there are three differences.

  1. The node, or XML tag, that needs to be removed is called sharedDimension, not dimension. (highlighted in red)
  2. The attribute is not name in this instance, but is called dimension.  (highlighted in red)
  3. We have added a counter to identify whether the file has the dimension to be removed and only saves the file if it was altered.  (highlighted in green)
The Script
$lcmSourceDir = "Z:\Downloads\KG04\HP-SanPlan\resource\Global Artifacts\Composite Forms"
$dimName = "CustomerSegment"
# List all files
$files = Get-ChildItem $lcmSourceDir -Recurse | where {$_.Attributes -notmatch 'Directory'} |
# Remove CustomerSegment
Foreach-Object {
  # Reset a counter to 0 - used later when files is saved
  $fileCount = 0

$xml = Get-Content $_.FullName
$node = $xml.SelectNodes(“//sharedDimension“) | Where-Object {$_.dimension -eq $dimName}  | ForEach-Object {
#Increase the counter for each file that matches the criteria
    $fileCount++
# Remove each node from its parent
[void][/void]$_.ParentNode.RemoveChild($_)
}
# If the dimension was found in the file, save the updated contents.
  if($fileCount -ge 1) {
$xml.save($_.FullName)
Write-Host “$_.FullName updated.”
    }
}

Summary

The first script may need to be run on multiple plan types, but the results is an identical folder structure with altered files that have the identified dimension removed.  This can be zipped and uploaded to Shared Services and used to migrate the forms to the application that has the dimension removed.

The scripts above can be copied and pasted into PowerShell, or the code can be Downloaded.


If you are using PBCS, you may run into some challenges with large files being passed through FDMEE.  Whether performance is an issue or you just want to parse a file my month/year, this script might save you some time.

The Challenge

I recently had the need to break apart a file.  The source provided one large text file that included 2 years of data that was needed to populate the history of an employee metrics application.  The current process loaded files by month and we wanted to be able to piggy back off the existing scripts to load and process data in FDMEE and the monthly Planning data pushes to the ASO reporting cube.  Read more


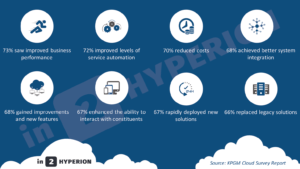
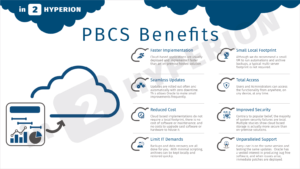
I have been using PBCS for over a year now.  As much as it surprises me, I am a fan.  From my experience, I have seen good performance, above average stability, above average accessibility, and I enjoy the cutting edge functionality that is lacking with on-premise implementations.  I created some info-graphics for presentations and thought I would share with the community.  As always, if you would like to contract me for design work, I am always excited to take on interesting and challenging work.  If you would like to donate, click the link to the right.

Please remember that I put a lot of work into these works, so please do not alter or use without consent.


Working with Jake Turrell always benefits me in many ways.  Jake found a fantastic way to minimize the effort it takes to create test accounts for testing and training Planning users.  You no longer have to create new multiple accounts.

“During the testing phase of most Planning implementations, developers need to create test user accounts.  I typically create at least one test user for each security group so I can verify that the correct access has been assigned.  With an on-premises Hyperion Planning implementation, this is easy – simply create user ID’s in the Shared Services native directory.  With PBCS, creating bulk test ID’s can be difficult, as each user ID requires a unique e-mail address.  If you need 50 test users, should you create 50 fake/temporary e-mail accounts?  Luckily the answer is no.”

Check out how here.

About Jake

Jake Turrell is a Hyperion Architect and Oracle Ace Associate with over 20 years of experience implementing Enterprise Performance Management solutions. Jake’s technology career began in the early 90’s as a Financial Systems intern at Dell in Austin, Texas, administering IMRS Micro Control (the DOS-based predecessor to Hyperion Enterprise). After working at Dell, Jake joined Ernst & Young’s Management Consulting practice where he worked with a variety of technologies. He later returned to the Hyperion world and joined a boutique Hyperion consulting firm in Dallas, Texas.
Jake has spent the last 17 years implementing Hyperion Planning and Essbase solutions for a variety of clients across multiple industries. Certified in both Hyperion Planning and Essbase, Jake holds a BBA from the University of Texas at Austin.